Need a Screenshot on Your MacBook? One Command Can Capture Exactly What You Need.
A brilliant idea appears on screen. A message you need to keep. A beautiful detail in a design. A tiny bug you need to show someone. Sometimes you simply want to keep exactly what is in front of you before it disappears.
On a MacBook, you do not need to install another screenshot app or build a complicated workflow. macOS already has powerful screenshot tools built in. With one simple Terminal command, you can ask it to capture exactly the part of the screen you want.
The best part is how little this interrupts your day. You do not have to hunt through menus, remember several key combinations or install anything extra. You choose what matters, capture it, and get straight back to what you were doing.
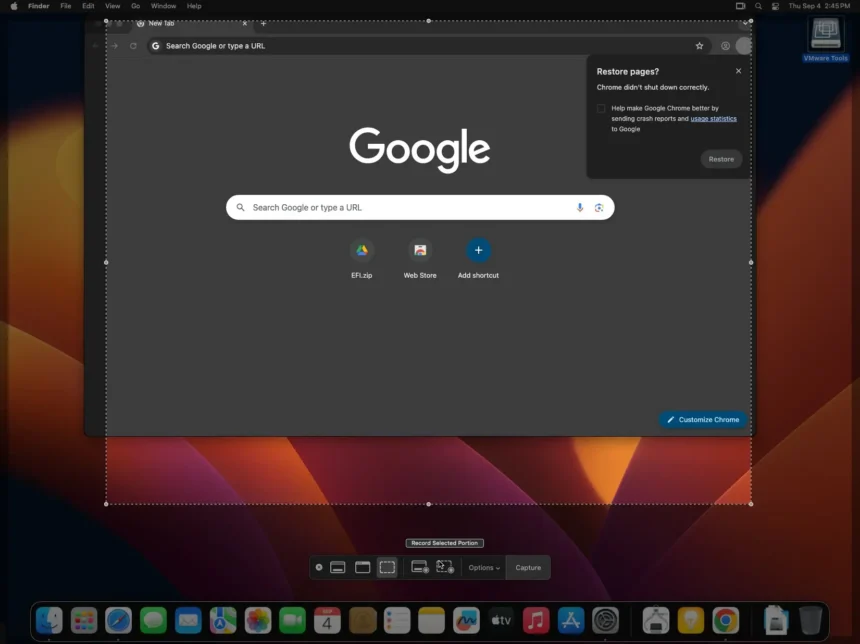
The good news: you already have everything you need. macOS includes built-in screenshot tools for the whole screen, a selected area, individual windows, menus and even screen recordings.
Why Use a Command Instead of Another Screenshot App?
There is nothing wrong with the familiar Mac screenshot shortcuts. They are quick and useful. But if what you want is one repeatable action that you can run whenever you need it, Terminal gives you something different: direct access to the screenshot utility already built into macOS.
You do not need to install a third-party screenshot app, give it access to your Mac, or learn another interface. The command calls Apple’s own built-in utility and tells it where to save the capture.
That makes the method especially useful when you want a clean, repeatable workflow: capture the important part of the screen, save it directly to a known location, and keep moving.
The One Command That Does It
Here is the command we recommend. It uses the screenshot utility already included with macOS and lets you select the exact area you want to capture.
Open Terminal, paste the command below, and press Enter. Your pointer will switch to screenshot selection mode, allowing you to drag over the part of the screen you want to keep.
No extra screenshot application. No separate cropping step for a simple capture. You choose the frame first, and the built-in macOS utility saves that selection as a PNG file.
The command is simple enough to keep as a reusable shortcut in your own notes, and because it uses a native macOS tool, there is nothing additional to install or keep running in the background.
How to Use It
You only need three steps. The first is opening Terminal — you can do that with Spotlight by pressing Command + Space and typing Terminal.
Then paste this command:
Copy the Command
Click below to copy the command. It only launches the built-in screenshot tool in interactive selection mode; it does not install, change or delete anything on your Mac.
screencapture -i ~/Desktop/screenshot.png
Paste into Terminal
Open Terminal from Applications → Utilities, then paste the command using:
⌘ Command + V
You are not changing the system. You are simply asking macOS to start its built-in screenshot utility and let you choose what to capture.
Press Enter
Press Enter ↵. Your screen will enter selection mode. Drag across the area you want to capture, then release.
One Command. No Extra App. No Extra Clutter.
This approach is useful because it keeps the workflow beautifully small. Instead of downloading an app simply to take screenshots, you are using a utility that is already part of macOS.
The command does one clear job: it launches the native screencapture tool in interactive selection mode and writes the resulting image to a file you choose.
That means fewer moving parts. There is no third-party interface to learn, no subscription to remember, and no separate screenshot utility sitting on your Mac just for one small task.
And because the output path is part of the command, the destination is predictable. You know exactly where your screenshot is going instead of wondering which folder an app chose for you.
What the Command Actually Does
The command uses macOS’s native screencapture utility. The -i option starts interactive selection, while ~/Desktop/screenshot.png tells macOS to save the finished capture to your Desktop with that filename.
Nothing is being installed or deleted. The command simply asks a tool that is already on your Mac to capture the area you select and save the result as a PNG image.
That is the whole idea: one command, one capture, one file.
You can still use Apple’s keyboard shortcuts whenever they are convenient. But if you want one command you can remember, paste and reuse, this is the one to keep.
What Happens After You Press Enter?
After you press Enter, select the area you want. Release the pointer, and macOS creates the image immediately.
The file is saved as screenshot.png on your Desktop, ready to open, rename, attach to an email, drop into a document or send to someone who needs to see exactly what you saw.
If you prefer a different destination, macOS’s built-in Screenshot settings also let you choose where screenshots are saved.
Why This Is Better Than Installing Another Screenshot App
A screenshot app can certainly offer extra features. But for the everyday question — “I need a screenshot right now” — installing another program can be more than you need.
The built-in command is wonderfully direct. It uses a native macOS utility, creates a standard image file, and does not ask you to learn another app just to capture your screen.
For a simple screenshot workflow, that can be all you need: less software, fewer steps, and one reliable way to turn what is on your screen into something you can actually use.
Make Screenshots Feel Effortless
The real beauty of a good screenshot workflow is not the command itself. It is what disappears around it: the searching, the menu hunting, the extra apps and the tiny decisions that slow you down.
You see something worth keeping. You run one command. You select it. The image is there.
That is the kind of Mac trick worth knowing — small, native and useful enough that you actually want to use it.
One Small Mac Trick You’ll Be Glad You Know
There is something satisfying about discovering that your Mac already has the answer. You do not need another download. You do not need another account. You do not need another icon taking up space in your workflow.
You just use what is already there — and suddenly a task that felt slightly annoying becomes almost invisible.
Once screenshots become effortless, you stop thinking about how to capture the screen and start thinking about what you actually want to do with the image. Send it. Save it. Explain something. Keep a moment. Move on.
Still Not Getting the Screenshot You Want?
If your screenshot is not appearing where you expect, the command is not behaving as planned, or you simply want a smoother Mac workflow, the problem is usually easier to solve than it looks.
A well-set-up Mac should make everyday actions feel natural. The less time you spend fighting your tools, the more time you have to create, communicate and get on with your day.
Sometimes the best improvement is not another app at all. It is discovering how much your Mac can already do — and finding the simplest way to put that power within reach.